Introduction
Scarf knit pattern – Knitting a scarf is a wonderful introduction to the world of knitting, offering a simple yet satisfying project that yields a functional and fashionable accessory. As a beginner, selecting the right pattern is key to maintaining motivation and achieving a successful outcome. This guide outlines beginner-friendly knitting patterns for creating a stylish scarf, focusing on straightforward stitches, clear instructions, and tips for customization.
Garter Stitch Scarf
The garter stitch is perhaps the most fundamental stitch in knitting, making it ideal for absolute beginners. This stitch involves knitting every row, resulting in a squishy, textured fabric that looks great on both sides.
Materials Needed:
- Yarn: Bulky or worsted weight yarn for faster progress and a cozy feel.
- Needles: Appropriate size for your chosen yarn, usually US 8-10 (5-6 mm) for worsted or US 11-13 (8-9 mm) for bulky.
- Scissors and tapestry needle for finishing.
Pattern:
- Cast on any number of stitches (aim for at least 20 for a narrow scarf, more for wider).
- Knit every row until the scarf reaches your desired length.
- Bind off and weave in ends.
Stockinette Stitch Scarf with Garter Edges
For a touch of variety, try combining garter stitch edges with a stockinette stitch body. This creates a smooth, classic look with neat edges that don’t curl.
Materials: Same as above.
Pattern:
- Cast on an odd number of stitches.
- Row 1: Knit all stitches.
- Rows 2-3: Knit the first 3 stitches, purl until the last 3 stitches, then knit the last 3 stitches. Repeat these two rows to form the stockinette stitch section with garter stitch borders.
- Continue until the scarf is long enough, then end with a knit row followed by a bind off.
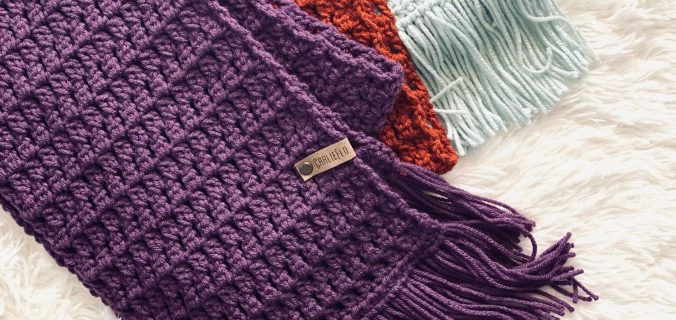
Ribbed Scarf
Ribbing provides elasticity and a lovely textural pattern. A simple 2×2 rib (knit 2, purl 2) is easy to remember and adds a touch of sophistication.
Materials: Same as above, though a slightly smaller needle size can give a neater ribbing.
Pattern:
- Cast on an even number of stitches.
- Row 1: K2, P2; repeat from * to * until the end of the row.
- Row 2: P2, K2; repeat this row for the pattern.
- Continue until the scarf reaches the desired length, then bind off in pattern.
Tips for Success:
- Swatch First: Before diving into your project, knit a small swatch to test your tension and ensure you’re happy with the fabric’s look and feel.
- Choosing Yarn: Don’t be afraid to experiment with different colors and textures. Variegated or self-striping yarns can add visual interest without needing complex stitches.
- Blocking: Once your scarf is complete, blocking (lightly wetting and shaping your knitted piece) can enhance the stitch definition and even out any unevenness.
- Customize: Personalize your scarf by adding stripes, pom-poms, tassels, or绣花织物 (embroidered details) for a unique touch.
- Practice Patience: Remember, knitting is a process. Enjoy each stitch and the calming effect it can bring. Mistakes happen; they’re part of learning, and you can always undo and redo.
By starting with these beginner-friendly patterns, you’ll not only create a stylish accessory but also build a strong foundation in knitting skills. As you gain confidence, feel free to explore more complex stitch patterns and designs, knowing that the basics you’ve learned will serve you well in any knitting adventure.
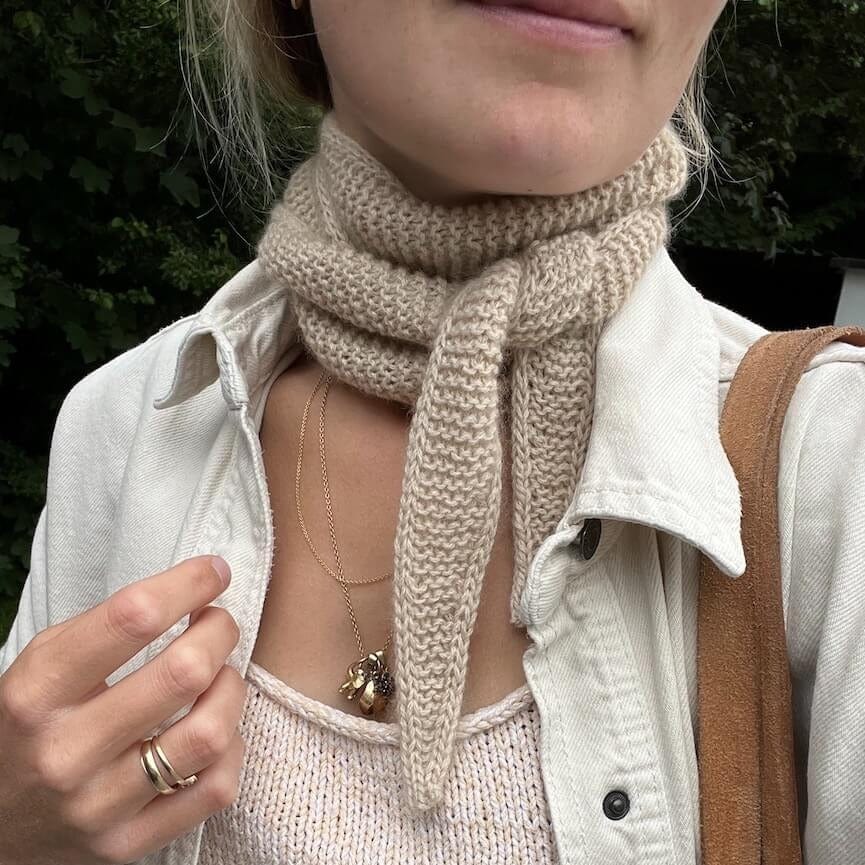
Garter Stitch Scarf
Skill Level: Beginner
Materials Needed:
- Medium-weight yarn (e.g., worsted weight)
- Knitting needles (size appropriate for your yarn)
- Yarn needle for weaving in ends
Pattern:
- Cast On: Cast on about 30-40 stitches, depending on how wide you want your scarf to be.
- Knitting: Knit every row (garter stitch) until the scarf reaches your desired length.
- Bind Off: Bind off all stitches loosely.
- Finishing: Weave in ends using a yarn needle.
Tips: This pattern is excellent for beginners as it allows you to practice the basic knit stitch throughout the entire project. You can customize the length and width of the scarf according to your preference.
Ribbed Scarf
Skill Level: Beginner
Materials Needed:
- Medium to bulky weight yarn
- Knitting needles (appropriate size for your yarn)
- Yarn needle for weaving in ends
Pattern:
- Cast On: Cast on an even number of stitches (e.g., 40 stitches).
- Rows 1-4: Knit 2, purl 2 across all rows (this creates a ribbing pattern).
- Repeat: Continue knitting in the rib pattern until the scarf reaches your desired length.
- Bind Off: Bind off all stitches in pattern.
- Finishing: Weave in ends neatly.
Tips: Ribbed scarves are great for beginners because they introduce you to alternating knit and purl stitches, adding texture and stretch to your scarf.
Seed Stitch Scarf
Skill Level: Beginner to Intermediate
Materials Needed:
- Worsted weight yarn
- Knitting needles (appropriate size for your yarn)
- Yarn needle for weaving in ends
Pattern:
- Cast On: Cast on an odd number of stitches (e.g., 35 stitches).
- Row 1: *Knit 1, purl 1; repeat from * to end of row.
- Row 2: *Purl 1, knit 1; repeat from * to end of row.
- Repeat Rows 1 and 2: Continue alternating rows until the scarf is the desired length.
- Bind Off: Bind off all stitches loosely.
- Finishing: Weave in ends neatly.
Tips: The seed stitch pattern creates a textured fabric that lies flat and is reversible, making it an engaging yet achievable project for beginners.
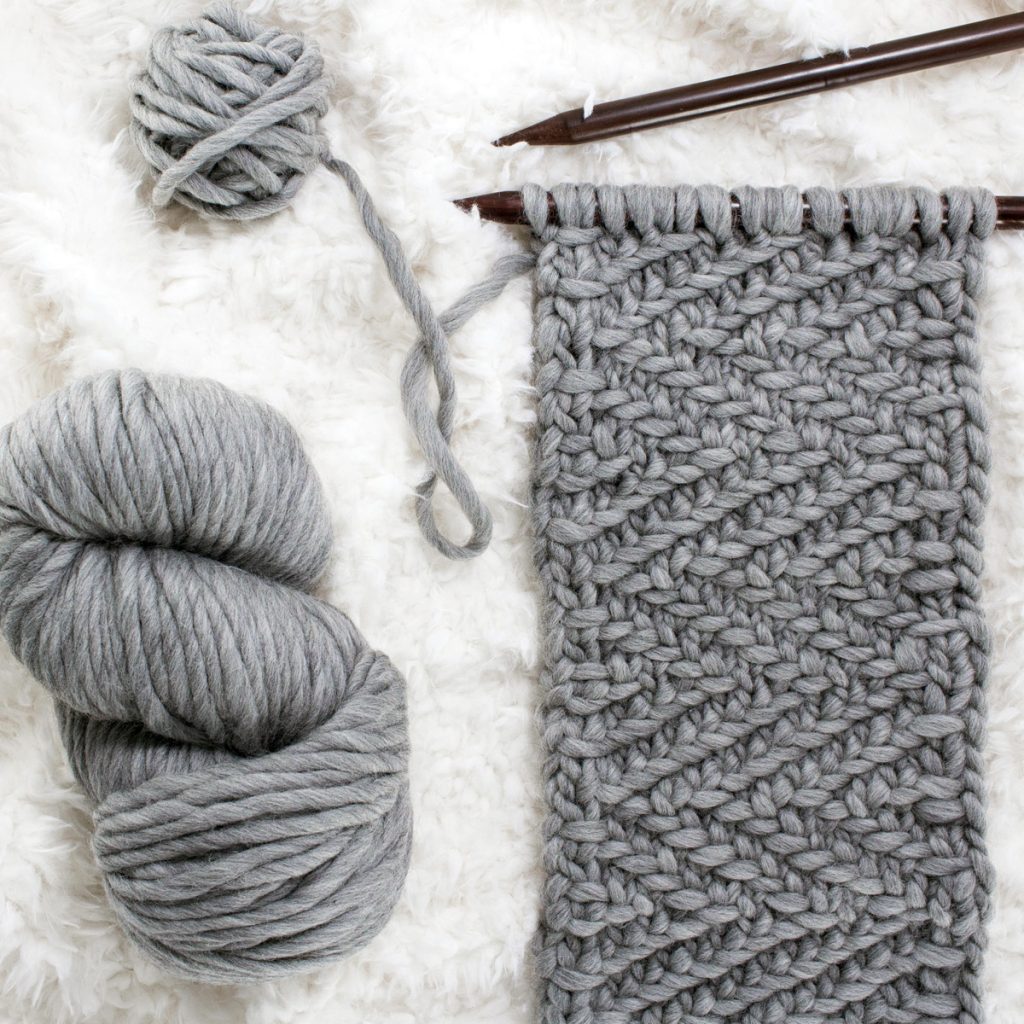
Basketweave Scarf
Skill Level: Intermediate
Materials Needed:
- Bulky weight yarn
- Knitting needles (appropriate size for your yarn)
- Yarn needle for weaving in ends
Pattern:
- Cast On: Cast on a multiple of 8 stitches plus 4 extra stitches (e.g., 28 stitches).
- Row 1 (Right Side): Knit all stitches.
- Row 2: Purl all stitches.
- Rows 3-6: Repeat Rows 1 and 2 twice more.
- Rows 7-10: Knit the first 4 stitches, *purl 4, knit 4; repeat from * to last 4 stitches, knit the last 4 stitches.
- Rows 11-14: Purl the first 4 stitches, *knit 4, purl 4; repeat from * to last 4 stitches, purl the last 4 stitches.
- Repeat Rows 1-14: Continue repeating Rows 1-14 until the scarf reaches your desired length.
- Bind Off: Bind off all stitches in pattern.
- Finishing: Weave in ends neatly.
Tips: The basketweave pattern involves knit and purl combinations to create a textured fabric that resembles a woven basket. It’s a great project for beginners looking to challenge themselves with simple stitch patterns.
Tips for Beginners:
- Start Simple: Begin with basic stitch patterns like garter or ribbing before progressing to more complex designs.
- Choose the Right Yarn: Opt for yarn that is smooth and easy to work with, such as worsted weight yarn, to make learning easier.
- Practice Consistently: Knitting is a skill that improves with practice. Don’t worry about making mistakes; they are part of the learning process.
- Use Helpful Resources: Online tutorials, knitting books, and local knitting groups can provide valuable support and guidance.
By starting with these beginner-friendly knitting patterns, you’ll not only create stylish scarves but also develop foundational knitting skills that will serve you well in future projects. Enjoy the process of knitting and experimenting with different yarns and patterns to create scarves that reflect your personal style!
Seed Stitch Scarf
The seed stitch creates a bumpy, textured fabric that looks intricate but is deceptively simple to execute, making it another favorite for beginners.
Materials: Similar to previous projects, with a medium weight yarn and needles appropriate for that yarn.
Pattern:
- Cast on an even number of stitches.
- Row 1: K1, P1; repeat from * to * across the row.
- Row 2: P1, K1; repeat this row for the pattern.
- Continue alternating these two rows until the scarf reaches your desired length.
- Bind off and weave in ends.
Mistake Rib Scarf
The mistake rib stitch pattern gives the illusion of complexity but is formed with a basic repeat, offering a forgiving (fabric) for beginners.
Materials: As before, but consider a slightly thicker yarn to highlight the stitch pattern.
Pattern:
- Cast on any number of stitches.
- Row 1 (RS): K2, P2; repeat from * to *, ending K2 if necessary.
- Row 2 (WS): Knit the knit stitches and purl the purl stitches as they face you.
- Repeat Rows 1 and 2 for the pattern.
- Work until the scarf is the length you want, bind off, and finish.
Striped Scarf
Adding stripes to any of the above patterns is an easy way to introduce color and personality to your scarf. Simply switch colors every few rows or after completing a certain pattern repeat.
Tips for Stripe Success:
- Weave in ends as you go to minimize finishing work later.
- If changing colors mid-row, twist the old and new yarns around each other to prevent gaps.
- Plan your stripe sequence ahead of time for a cohesive design.
Advanced Beginner Techniques to Explore:
Once you’ve mastered these basic patterns, consider trying:
- Cable Knitting: Adding cables to your scarf can elevate its look with beautiful twists and braids.
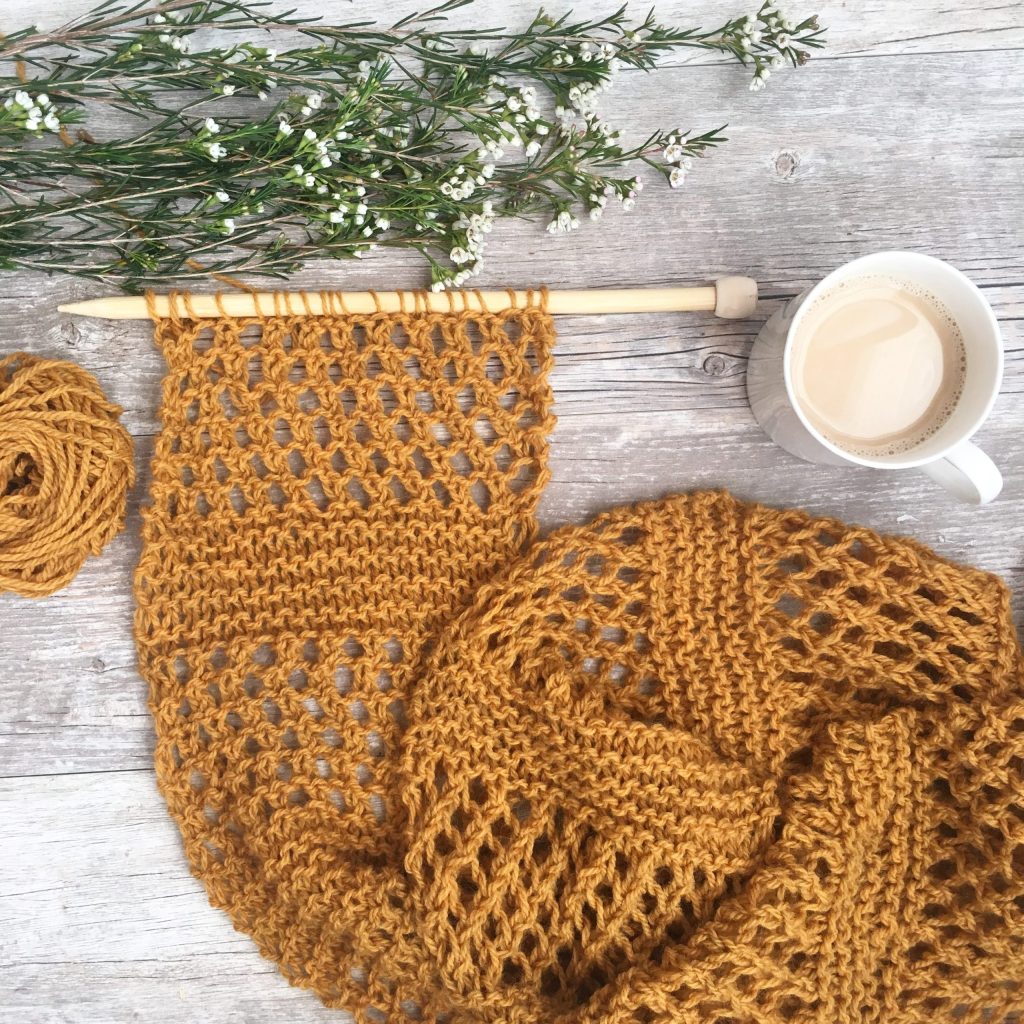
- Lace Patterns: Simple lace stitches, like the feather and fan pattern, introduce holes and texture for a delicate touch.
- Mosaic Knitting: Using slipped stitches to create colorwork patterns, mosaic knitting is an easier alternative to Fair Isle for beginners.
Remember, knitting is a journey of continuous learning. Start with these beginner-friendly patterns and gradually challenge yourself with new techniques. Each completed project will not only enrich your wardrobe but also deepen your understanding and love for this timeless craft.