Introduction
Knitting scarf – Knitting is not only a practical skill but also a wonderfully rewarding hobby that allows you to create beautiful, handmade items. If you’ve ever considered picking up those needles, you might be wondering where to begin. A scarf is the perfect project for novice knitters to develop their skills while producing something both functional and stylish. In this guide, we will walk you through everything you need to know to knit your very first scarf, from gathering materials to mastering basic techniques.
Why Knit a Scarf?
Scarves are an ideal starter project for several reasons:
- Simplicity: Scarves are typically long rectangles, which means minimal shaping and complex stitches.
- Versatility: You can play around with various yarn types, colors, and stitches, allowing for unlimited creativity.
- Quick Results: A scarf can be completed relatively quickly, giving you a sense of accomplishment and encouraging you to continue knitting.
Gathering Your Supplies
Before you dive into your knitting adventure, let’s gather the supplies you’ll need:
1. Yarn
Choose a worsted weight yarn (medium weight, category 4). It’s easy to work with and provides a good balance between thickness and warmth. Beginner-friendly yarn options include:
- Acrylic: Affordable, durable, and comes in a wide range of colors.
- Wool: Slightly pricier but provides excellent warmth and can be softer than acrylic.
- Cotton: While it’s not the warmest, it’s a good choice for lightweight scarves, especially for spring or summer.
2. Needles
You will need a pair of knitting needles. For worsted weight yarn, size 8 or 9 (US) needles are generally recommended. You can choose between:
- Straight Needles: Great for beginners, used to knit flat pieces like scarves.
- Circular Needles: If you’re feeling adventurous, these can also work for scarves and are useful for many other projects.
3. Other Supplies
- Tape Measure: To track the length of your scarf.
- Scissors: To cut your yarn.
- Tapestry Needle: For weaving in loose ends after finishing your scarf.
4. Choosing a Pattern
While your scarf design can be as simple as a basic garter stitch, you may want to try out a couple of patterns. Here are three beginner-friendly options:
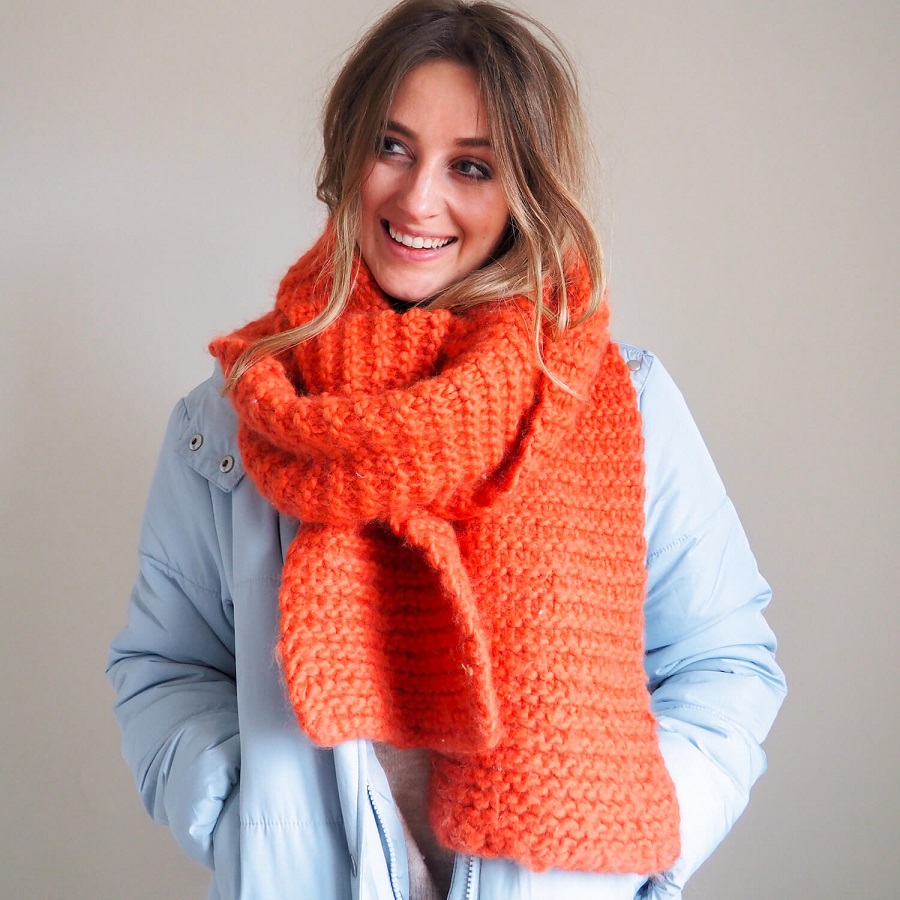
- Garter Stitch Scarf: Knit every stitch on every row. This stitch creates a squishy, textured scarf.
- Stockinette Stitch Scarf: Alternate between a row of knit stitches and a row of purl stitches. This creates a smooth and straight fabric.
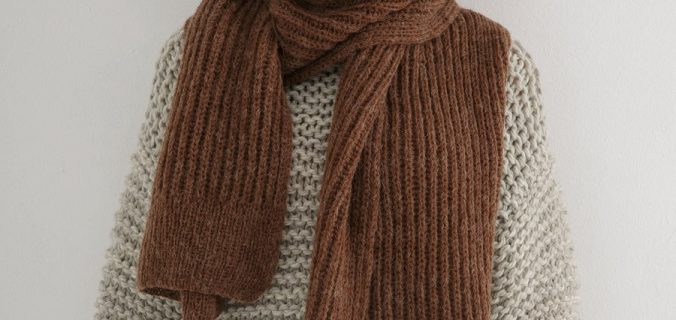
- Ribbed Scarf: Alternate between knit and purl stitches within the same row (e.g., k2, p2). This results in a stretchy yet elegant design.
Learning Basic Knitting Techniques
Before you start knitting, familiarize yourself with basic knitting techniques.
1. Casting On
Casting on is the first step in the knitting process, which involves creating the initial stitches on your needle. The long tail cast-on method is popular among beginners.
How to Cast On:
- Make a Slipknot: Create a loop with your yarn and pull the working yarn through. Tighten to secure.
- Hold the Yarn: Wrap the tail end of the yarn around your thumb and hold the working yarn with your fingers.
- Insert the Needle: Slip the needle under the yarn on your thumb, then pull the yarn through to create a new stitch on the needle.
- Repeat: Continue this process until you have the desired number of stitches (around 30-40 stitches is a good starting point for a standard scarf).
2. The Knit Stitch
The knit stitch is one of the foundational stitches in knitting.
How to Knit:
- Hold Your Needles: Hold the needle with the cast-on stitches in your left hand and the other needle in your right.
- Insert the Right Needle: Insert your right needle into the first stitch on the left needle from front to back.
- Wrap the Yarn: Use your working yarn to wrap around the right needle from back to front.
- Pull Through: Pull the right needle through the stitch, creating a new loop.
- Slide Off the Left Needle: Take the old stitch off the left needle, leaving the new stitch on the right needle.
3. The Purl Stitch
The purl stitch creates a different texture and is essential for patterns like stockinette and ribbing.
How to Purl:
- Hold the Needles: Start as you did for the knit stitch.
- Insert the Right Needle: Insert your right needle into the first stitch on the left needle from back to front.
- Wrap the Yarn: Wrap the working yarn around the right needle from front to back.
- Pull Through: Pull the right needle through the stitch, creating a new loop.
- Slide Off the Left Needle: Slip the old stitch off the left needle.
4. Binding Off
Once your scarf reaches your desired length, it’s time to bind off.
How to Bind Off:
- Knit the First Two Stitches: Begin by knitting the first two stitches as you normally would.
- Lift the First Stitch: Use your left needle to lift the first stitch over the second and off the needle.
- Knit Another Stitch: Knit one more stitch, then repeat the process of lifting the first stitch over the second until you have one stitch left.
- Cut the Yarn: Once you have one stitch, cut the working yarn leaving a tail, and pull it through the last stitch to secure it.
Weaving in Ends
After binding off, there will likely be loose yarn tails. Use your tapestry needle to weave these ends into the knitted fabric to secure them and create a neater finish.
Optional: Adding Fringe
If you want to add a fun touch to your scarf, consider adding fringe:
- Cut Yarn Lengths: Cut yarn lengths for fringe (about 6-8 inches works well).
- Attach Fringe: Fold each length in half and use your fingers to pull the loop through the edge stitch on your scarf. Pull the ends through the loop to secure.
- Repeat: Continue this process along the entire edge of your scarf.

Understanding the Basics of Knitting
Before embarking on the intricate journey of crafting beautiful scarves, it is essential to familiarize yourself with the basic knitting techniques. You will need to master two fundamental stitches: the knit stitch and the purl stitch. The combination of these stitches allows for endless patterns and textures.
- Knit Stitch (k): This is the most fundamental stitch in knitting. It creates a smooth, V-shaped fabric on the front side of your project and is achieved by inserting the needle through the front of the stitch and wrapping the yarn around.
- Purl Stitch (p): The purl stitch produces a textured, bumpy fabric on the front side. To execute a purl stitch, the needle is inserted from the back to the front, wrapping the yarn around the needle.
Once these foundational stitches are mastered, you’re ready to expand into more complex techniques like ribbing, cabling, and lace patterns, all of which can add beauty and intricacy to your scarves.
Choosing the Right Yarn
Selecting the appropriate yarn is crucial as it affects both the feel and appearance of your finished scarf. Here are some factors to consider when choosing yarn:
- Fiber Content: Yarn is made from a variety of fibers, including wool, cotton, acrylic, and alpaca. Wool is particularly popular for winter scarves due to its warmth and elasticity, while cotton is excellent for lighter, breathable scarves suitable for transitional seasons.
- Weight: Yarn comes in different weights (from lace to bulky), which dictates how thick your scarf will be. A lightweight yarn can create a delicate, airy scarf, while bulky yarn produces a chunky, cozy texture.
- Color and Dye: The color and dye of your yarn can dramatically change how the finished product looks. Consider whether you want a solid color for a classic look, or if you prefer variegated or hand-dyed yarns for a more unique, colorful effect.
Selecting Patterns and Styles
Scarves come in countless styles, and choosing the right pattern can enhance your knitting experience. Here are some popular scarf styles to consider:
- Garter Stitch Scarf: This is the simplest of all scarves, created by knitting every row. It yields a squishy, textured fabric and is ideal for beginners.
- Ribbed Scarf: Alternative rows of knit and purl stitches create a ribbed effect. This design is stretchy and stylish, making it a favorite for those seeking a snug fit.
- Cabled Scarf: Adding cables introduces a sophisticated twist to your knitting. This technique remains visually stunning, creating a raised pattern that resembles twisted ropes.
- Lace Scarf: For those looking to challenge their skills, a lace scarf combines yarn overs and decreases to create delicate patterns with openwork. This style is perfect for showcasing intricate designs.
- Infinity Scarf: A trendy choice, the infinity scarf is a looped design you can wrap around your neck multiple times. It can be knitted in a variety of stitches, offering both style and versatility.
Essential Tools and Accessories
To create beautiful scarves, you’ll need a few essential tools:
- Knitting Needles: The size of your needles will depend on the weight of your yarn and the desired stitch. For example, a worsted weight yarn typically requires US size 8 needles.
- Tapestry Needle: This needle is used for weaving in loose ends and completing projects.
- Scissors: A sharp pair of scissors is essential for cutting your yarn when finishing your project.
- Stitch Markers: These handy tools help keep track of stitch patterns or indicate where increases or decreases occur.
- Measuring Tape: Accurate measurements are vital, especially when crafting scarves with specific sizes in mind.
Tips for a Successful Knitting Experience
- Practice Patience: Knitting can be a meditative process, and it may take time to achieve the desired results. Don’t rush – enjoy every stitch.
- Start Small: If you’re new to knitting, begin with simple patterns to build your confidence before tackling more complex projects.
- Use Ravelry: Online communities like Ravelry can be invaluable resources for finding patterns, sharing tips, and connecting with fellow knitters.
- Keep a Gauge Swatch: Always create a gauge swatch to ensure your stitches match the pattern. This step can prevent sizing issues in your finished project.
- Experiment and Personalize: Don’t be afraid to experiment with colors, textures, and patterns. Personalizing your scarves will make them unique and special.
Finishing Touches
Once you’ve completed your scarf, it’s time to add the finishing touches. Weaving in any loose ends with a tapestry needle ensures your work appears polished. If you’ve used yarn that stretches or curls, consider blocking your scarf to help it take its final shape. Wetting the fabric and laying it flat to dry can enhance the appearance of lace and intricate stitches.

Conclusion
Congratulations! You’ve completed your first knitted scarf. This simple yet satisfying project has taught you essential knitting techniques that you can build upon as you continue to develop your skills.
Knitting is not just about producing beautiful items; it’s a meditative and creative outlet that allows you to unwind and express your personality. As you start to explore different yarns, patterns, and techniques, remember: the journey of learning is just as important as the final product. So grab your needles, relax, and enjoy the wonderful world of knitting!
