Introduction to Finger Knitting
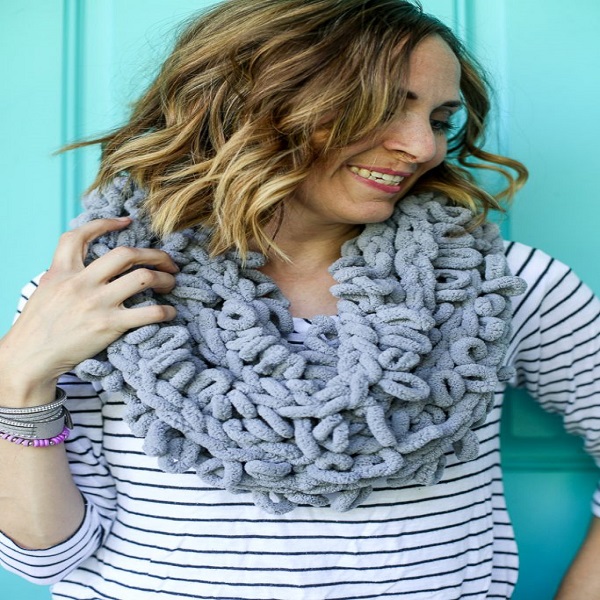
Finger knitting is a fun, creative way to make a scarf. You don’t need needles. All you need are your hands. This craft is perfect for beginners. It’s also a great way to introduce kids to knitting. Through finger knitting, you can make a cozy scarf. And you can do it anywhere. You can knit while on a bus, watching TV, or waiting in a line. It is simple and portable. Finger knitting works by looping yarn around your fingers. You then weave the yarn to create a fabric. This results in a beautiful, chunky pattern. Perfect for scarves! Want to know how to finger knit a scarf? Just follow this easy guide. In this guide, we’ll cover materials, steps, and tips. We’ll also explore scarf variations and how to care for your creation.
 Materials Needed for Your Finger Knit Scarf
Before diving into how to finger knit a scarf, let’s talk about what you’ll need. The materials are straightforward and easy to find. Here’s a quick rundown of the essentials:
- Yarn: Choose a bulky or super bulky yarn for the best results. The thicker the yarn, the easier it will be to handle with your fingers.
- Scissors: You will need a pair of scissors to cut the yarn when you start and finish your project.
- Measuring Tape: To measure the length of your scarf as you go along, a measuring tape will be useful.
- Yarn Needle (optional): A yarn needle can help weave in ends for a clean finish.
The type of yarn you select can add texture and color to your scarf. Look for yarns in your favorite shades or consider variegated options for a multi-colored effect. When shopping for yarn, consider the washability and durability, especially if you intend to wear the scarf often.
With these materials at hand, you’re all set to begin your finger knitting adventure. Remember, no needles are required, so you can start as soon as you’ve got your materials. Let’s move on to the next steps where you’ll learn the finger knitting process.
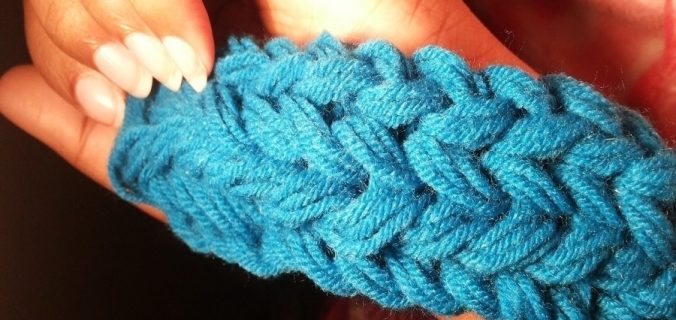
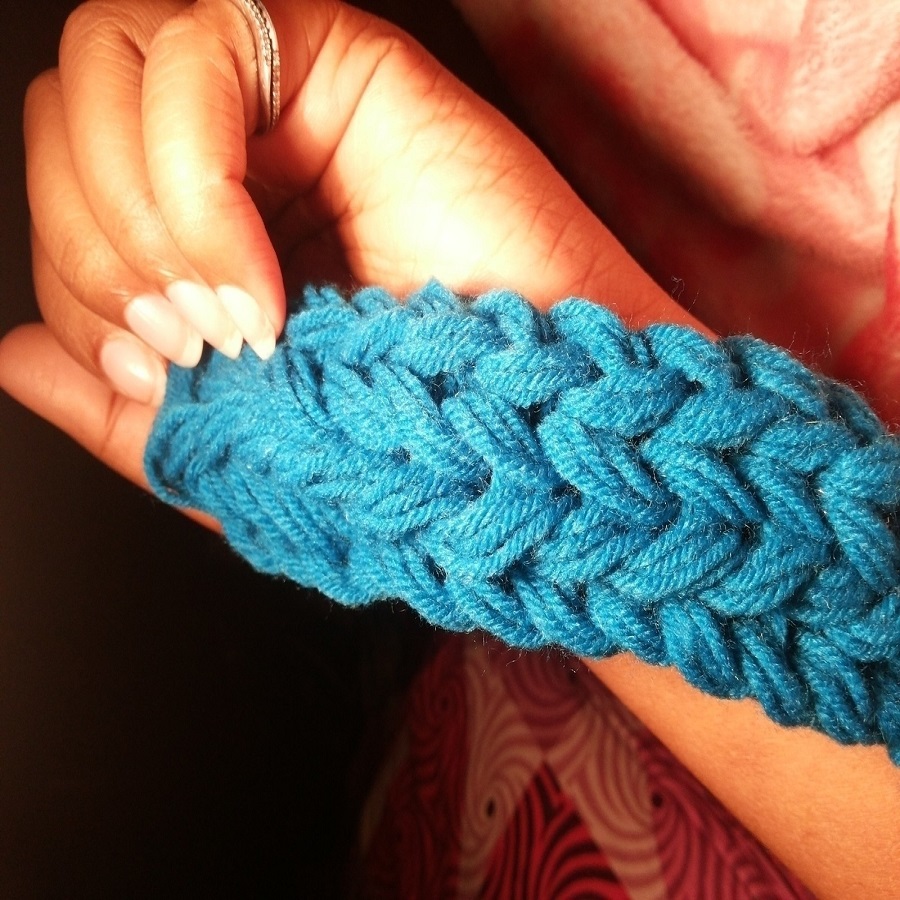
Step-by-Step Guide to Finger Knitting
Ready to start your finger knit scarf? Here’s how to finger knit a scarf step by step.
- Start with a Slipknot: Make a slipknot at the end of the yarn. Place it on your thumb.
- Cast On: Weave the yarn in and out between your fingers. Pull a loop through each space to cast on.
- First Row: Lift the bottom loop over the top on each finger. This creates the first row.
- Continue Knitting: Continue the process. Pull loops through and lift the bottom ones over the top.
- Build Length: Keep going until the scarf reaches your preferred length.
- Cast Off: To finish, cut the yarn. Pull it through the last loops. Tighten to secure.
Remember, relax your hands as you weave. Tension in the yarn is good, but not too tight. Your fingers are your knitting needles, so keep a steady rhythm. Just like regular knitting, consistency is key. Each row should look similar to the last one. This way, your scarf will have an even, professional finish.
Make sure to measure the scarf occasionally. It should be the length you desire. While finger knitting, watch out for uneven rows or loose loops. If you spot a mistake, don’t worry. Simply undo a few rows and redo them. Practice makes perfect in finger knitting. Don’t rush the process, enjoy it. Finger knitting can be a peaceful, meditative activity. Not only do you create something unique but it’s also relaxing.
Ready to give it a try? Grab your yarn and let’s get started on your cozy, hand-knit scarf!
Tips for Perfecting the Finger Knitting Technique
Mastering the technique of finger knitting can make your projects look and feel better. Here are some tips to help you perfect your finger knitting skills:
- Maintain Even Tension: Keep yarn tension consistent for a uniform look. Not too tight, not too loose.
- Use Bulky Yarn: Bulky yarns are easier to handle and create a robust fabric.
- Practice the Basic Stitch: Repeat the basic stitch to gain confidence and speed.
- Take Breaks: Taking short breaks prevents cramping and maintains even tension.
- Check Your Work: Regularly look over your work for dropped stitches or inconsistencies.
- Stay Patient: Mistakes happen. If you find one, just unravel a bit and redo.
- Use Quality Yarn: Good quality yarn resists fraying and makes finger knitting smoother.
- Secure the Ends: When finishing, weave in ends securely for durability.
Following these steps will lead to a more satisfying project. With practice, finger knitting can produce results as good as traditional knitting. And remember, everyone starts somewhere – so take your time, learn as you go, and enjoy the process of creating something by hand.
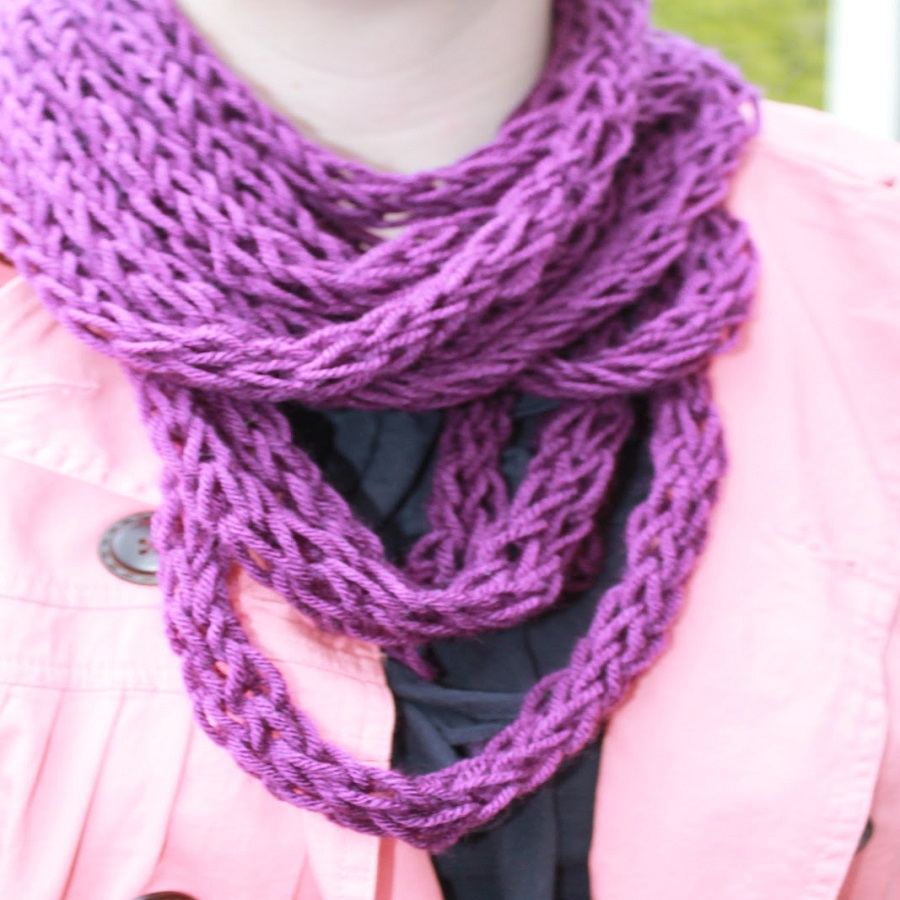
Variations and Patterns for Finger Knit Scarves
Once you’ve got the basics down, it’s time to explore variations. You can add style to your finger knit scarves with different patterns. Here are some ideas to inspire your next project:
- Texture Changes: Alternate the loops. Create ridges or a lacy look in your scarf.
- Stripes: Use different colors. Change the yarn every few rows for a striped pattern.
- Beads: Slide beads onto the yarn before you start. Add them into loops for sparkle.
- Chunky and Thin: Combine bulky with thin yarn. It creates an interesting texture.
- Fringe: After finishing, cut short lengths of yarn. Tie them to the scarf ends for a fun fringe.
- Braided Design: Finger knit several long strands. Braid them together for your scarf.
- Incorporate Ribbing: Knit some rows tighter. It simulates a ribbed pattern found in traditional knitting.
These variations can give your scarf a custom look. They make your creation stand out. Remember, while trying new patterns, keep practicing. Your skills will improve with each project. Soon, you’ll be able to mix and match techniques for unique designs. Don’t be afraid to experiment with your finger knit scarf. That’s how you’ll find the style that suits you best.
Finishing Touches for Your Finger Knit Scarf
Once you’ve reached the desired length for your scarf, finishing touches are essential to refine your creation. Here are some final steps to ensure your scarf looks polished and stays durable:
- Binding Off: Carefully remove each loop from your fingers, making sure to run the tail end of the yarn through the final loops. Pull tight to secure the end of your scarf.
- Weaving in Ends: Use a yarn needle, if you have one, to weave in the loose ends of your yarn back through the scarf. This prevents the yarn from unraveling and gives a neat appearance.
- Adding Tassels or Fringes: Cut additional yarn strands and knot them at the scarf’s ends for an extra touch of style. Fringes can add a playful element to your scarf.
- Blocking: Lay your scarf flat on a towel and gently steam it with an iron, avoiding direct contact. Blocking helps even out any inconsistencies and relaxes the stitches for a smoother look.
Stay patient and take your time with these steps to give your finger knit scarf a high-quality, handcrafted finish. Whether you keep the scarf for yourself or gift it, these finishing touches can make all the difference in its appearance and longevity.
Caring for Your Finger Knit Scarf
Once you have your beautiful finger knit scarf, caring for it is key.
Gentle Washing: Hand wash your scarf in cold water with mild detergent. Avoid wringing.
Drying: After washing, lay the scarf flat on a clean towel. Roll up the towel to blot excess water.
Avoiding Heat: Never put your scarf in a dryer. High heat can damage the yarn fibers.
Storing: Store your scarf in a cool, dry place. Use a drawer or a box to keep it safe.
Pilling Prevention: Use a fabric shaver to remove any pilling that occurs with wear.
Taking these simple steps will ensure your scarf remains soft, cozy, and looking great.
Creative Projects to Try After Mastering Finger Knitting
After you learn how to finger knit a scarf, don’t stop there. Your skills can create many unique items. Let your imagination run wild with these creative project ideas:
- Finger Knit Blankets: Sew long scarves together to make a warm, chunky blanket.
- Jewelry: Create bracelets and necklaces with thinner yarn for delicate accessories.
- Headbands and Ear Warmers: Keep your ears warm with a stylish finger knit band.
- Home Decor: Finger knit coasters, placemats, or even a comfy cushion cover.
- Holiday Decorations: Make festive garlands or wreaths to celebrate the seasons.
- Bags and Totes: Stitch finger knit panels for a unique, textured bag.
These are just a few ideas. With finger knitting, start small and try new things as you go. Each project improves your technique. It also gives you a chance to explore more patterns and textures.
With every loop and knot, you’ll discover just how versatile finger knitting can be. So pick up your yarn and bring your new ideas to life!