
Hats are essential accessories that not only provide protection from the sun but also elevate any outfit. They can suffer from sweat stains, dirt, and odors over time, making regular cleaning necessary. However, washing hats can be tricky without the right techniques, as improper cleaning may lead to damage or distortion. This guide will provide step-by-step instructions on how to wash hats safely, ensuring they remain in great condition and ready to wear.
Gathering Your Supplies
Necessary Materials
How to wash hats? Before you begin washing hats, gather all the materials you will need. The supplies will vary depending on the type of hat you are cleaning. However, most hats can be cleaned with some basic items readily available at home.
You will typically need a soft-bristle brush to remove loose dirt and debris. A damp cloth will come in handy for spot cleaning. You will also need mild detergent, such as a liquid dish soap or a gentle fabric cleaner. Avoid using harsh chemicals that can damage the fabric.
Additionally, for hats with stubborn stains or odors, consider having white vinegar or baking soda on hand. For drying, a clean towel is useful as well. Depending on the type of hat, having a hat form or a bowl can be beneficial to retain its shape during the drying process.
Checking Care Labels
Before you start washing any hat, it is essential to check the care label. The label provides guidelines on how to clean the specific fabric type. Different materials, like wool, cotton, or synthetic fibers, require different care methods.
For example, while cotton hats can often be machine washed, wool hats may need more delicate handling. Ignoring the care label can result in shrinkage, fading, or loss of shape. Therefore, always consult the label before beginning the cleaning process for safe and effective results.

Cleaning Baseball Caps
Step 1: Spot Cleaning
Baseball caps are among the most popular types of hats. They are often made of cotton or polyester, making them relatively easy to clean. Start by removing any loose dirt or debris using a soft-bristle brush. Be gentle to avoid damaging the fabric.
Next, mix a small amount of mild detergent with warm water in a bowl. Dip a cloth or sponge into the soapy water, then gently scrub any stained areas on the cap. Focus on problematic spots, such as the sweatband or where the fabric meets the visor. This initial step helps remove grime without soaking the entire cap.
Step 2: Rinse and Dry
Once you’ve spot-cleaned the cap, rinse it under cool running water to remove any detergent residue. Hold the cap underneath the faucet while ensuring water does not get inside the crown. Pat the cap gently with a clean towel to remove excess water.
Avoid twisting or wringing the cap, as this can distort its shape. To dry, place the cap upside down on a hat form or a clean, dry towel. This helps maintain its structure as it dries. Allow it to air dry completely, which may take several hours. Avoid using a dryer or direct sunlight, as heat can cause the cap to shrink.

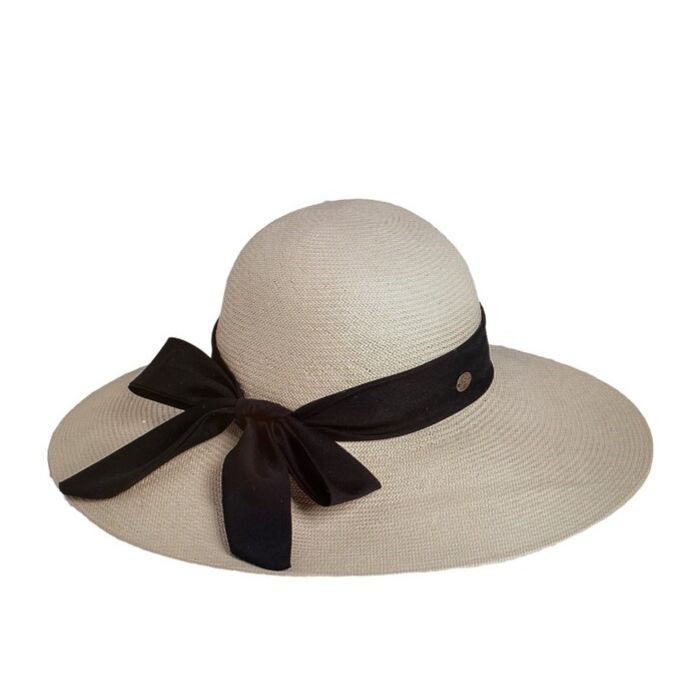
Washing Brimmed Hats
Step 1: Hand Washing
Brimmed hats, such as sun hats or straw hats, may require a different approach to cleaning. First, carefully check the material used to make the hat. For fabric brims, you can use a similar method as cleaning baseball caps. However, if the hat is straw or a stiff material, take extra caution.
For fabric brimmed hats, use a small basin to wash them. Fill the basin with lukewarm water and add a drop of mild detergent. Dip a soft cloth into the solution and gently scrub the fabric brim and lining of the hat. For stubborn stains, a soft toothbrush can help to get into the crevices.
Step 2: Rinse and Reshape
Once cleaned, rinse the hat under cool water to remove soap. Make sure no water runs through the inside crown. Shake off any excess water and reshape the brim gently. For straw hats, it’s essential to reshape them carefully to maintain their original form.
After reshaping, place the hat upside down on a towel or hat form for drying. Ensure it is kept away from direct sunlight to prevent fading or damage to the material. Allow it to dry completely before wearing it or storing it away.

Cleaning Wool Hats
Step 1: Protecting the Structure
Wool hats, including beanies and fedoras, require special care due to their unique fibers. To clean wool hats, start by gently brushing off any surface dirt with a clothes brush. If the hat has any loose embellishments, make sure to remove them before proceeding.
Create a mixture of cold water and a small amount of wool-specific detergent in a bowl. Dip a soft cloth or sponge into the solution and dab the area you wish to clean. Be careful not to soak the wool, as excessive moisture can lead to shrinking.
Step 2: Air Drying
After you’ve cleaned the area, use a damp cloth to wipe off any soapy residue. Rinse the cloth thoroughly to ensure it is only damp, not soaked. Run the damp cloth over the cleaned area to maintain the wool’s smoothness.
To dry the wool hat, reshape it and lay it flat on a clean towel. Avoid hanging it or placing it directly in the sunlight, as heat can cause the fibers to warp. Allowing the hat to air dry completely ensures that it retains its original shape and structure.
Addressing Stains and Odors
Tackling Specific Stains
Stains can be a common occurrence, especially for hats worn frequently. To tackle specific stains, treat them as soon as possible for the best results. For sweat stains, mix equal parts of white vinegar and water in a spray bottle. Lightly spray the affected area and let it sit for 10-15 minutes before blotting with a clean cloth.
Ink stains can be more challenging. Applying a small amount of rubbing alcohol to a cotton ball and dabbing it gently onto the ink stain may help lift the ink. Always test on an inconspicuous area first to ensure the fabric does not discolor.
Eliminating Odors
If your hats have developed unpleasant odors, a freshening treatment may be necessary. Sprinkling baking soda inside the cap can help neutralize odors. Let it sit overnight, then thoroughly shake it out to remove the baking soda residue.
Another option is to place the hat in a well-ventilated area to air out. If the hat’s material permits, lightly steaming it can also help reduce musty odors. Ensure you keep the steam at a safe distance to avoid damaging the fabric.

Preventing Future Damage
Storing Hats Properly
Preventing future damage requires proper storage of your hats when not in use. For baseball caps and beanies, consider storing them on a shelf or in a dedicated hat box. Avoid stacking hats, as this can cause them to lose their shape. Using specialized hat racks will keep your collection organized and protected.
How to wash hats? For brimmed hats, consider investing in a hat box that maintains the shape of the brim. Alternatively, store these hats upside down on a flat surface to retain structure. Regularly check your hat collection for any signs of wear, ensuring that they remain in good condition for the long term.
Cleaning Regularly
Incorporating regular cleaning into your routine can help maintain your hats. Consider spot-cleaning stains promptly, so they don’t set into the fabric. After each use, take a moment to brush off any dirt or debris before storing the hat away.
Regular upkeep not only prolongs the life of the hat but also ensures that it remains fresh and ready for wear. Establishing a routine will save time and effort, resulting in a well-preserved hat collection that you can enjoy for years.
Final Thoughts on Hat Care
Cleaning and maintaining hats requires a bit of care but is ultimately worth the effort. How to wash hats? By following proper washing techniques tailored to specific materials, you can ensure that your hats look and feel great for a long time.
How to wash hats? Taking the time to gather the necessary supplies, checking care labels, and understanding the unique needs of different hat types is essential. Additionally, addressing stains quickly and storing hats properly will help prevent future issues.
By embracing these cleaning practices and tips, you’ll extend the lifespan of your hats while keeping them ready for any occasion. Whether it is a sunny day out, a special event, or just running errands, fresh and clean hats will continue to enhance your style. Ultimately, taking care of your hats means you can enjoy them fully, showcasing your personality while protecting yourself from the elements.